The planning for the tutorial on how to make my awesome cuddling blankets has been put to a halt, once again. Since I haven't put out a craft post in about a week or so, I went digging through old projects and came up with this idea. This post is a look at past blanket projects I've done and actually finished. ^_^ There are three different blankets I am going to write about and show. One, is a hand-made chenille blanket. I followed a beautiful tutorial on how to make. I'll share the link to that later. The second one is just the plain baby minky blankets. Lastly, I'll show you guys the semi-quilted baby blanket I made as a custom order for a family friend. I actually found a lot of pictures on all these projects. :)
Chenille Baby Blanket
This blanket was the first large scale blanket I attempted once I got my awesome sewing machine. I stumbled upon a tutorial on how to make this blanket while surfing the web for DIY projects, before I started on Pinterest. The blanket and chenille isn't difficult to make, it just takes a very long time to get done. A lot of hours are spent sewing the lines and making sure all the layers of fabric stay neat and lined up. Here is the tutorial for all of you to check out! : Chenille Baby Blanket.
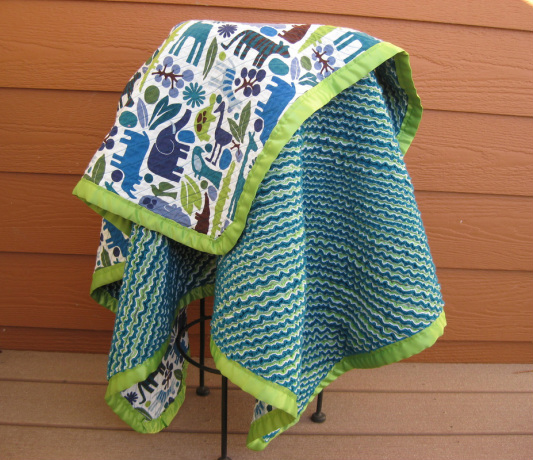
One of the toughest things for me when I am doing a sewing project is picking out that perfect fabric. I spent a good two and half hours in the fabric store before I came across this beautiful Alexander Henry design. From there, I had to pick out three coordinating cotton flannel fabrics. I got lucky and found the perfect matching colors. I chose a white, green, and matching teal color as the flannel for the chenille backing. I had to figure out from there how to balance all of the colors. At first I wanted the green to be the main color to show through on the chenille backing, but instead I choose a pretty green for the binding instead and the teal color seemed to make the blanket 'pop' more.
The sewing portion is relatively easy. Easy enough for a total beginner on the sewing machine to master at least. I only had my sewing machine maybe a less than a month before I took on this project. Simply put, you just cut all the fabric into the same matching sizes, and sew lines. It helped me, in order to keep the lines pretty much even apart, and straight. I used a washable fabric marker and marked out all my sewing lines. Since I could not for the life of me, sew in a straight line. Once you are done with all of your line sewing, you cut the fabric in-between each sewed line.
The sewing portion is relatively easy. Easy enough for a total beginner on the sewing machine to master at least. I only had my sewing machine maybe a less than a month before I took on this project. Simply put, you just cut all the fabric into the same matching sizes, and sew lines. It helped me, in order to keep the lines pretty much even apart, and straight. I used a washable fabric marker and marked out all my sewing lines. Since I could not for the life of me, sew in a straight line. Once you are done with all of your line sewing, you cut the fabric in-between each sewed line.
 Here's a picture of before I put it through the washer and dryer. I was terrible at sewing on the binding. There are mess ups all over it, and it's not always the same width away from the edge, but I do say, it's not as bad as it could have been for my first time sewing on a blanket binding. Since it was my first time, that is why I chose a wider binding than what the tutorial suggested. It gave me room for mistakes. The little mistakes though, give it character I think. I know that when I look at it, I see all the tiny little mistakes and details, versus when someone else looks at it. They might not see all the mishaps that I do. | This part never seemed to end. I highly suggest buying the niffty little tool the original tutorial suggests to buy. I ended up with some nasty blisters on my hands from all the cutting. At this point, I got worried because when you moved the blanket around after it was cut up, the spaces between the fabric made it seem limp and not at all warm enough to be a blanket. I didn't see how when I washed it how it would fill out and become the soft chenille. But, I stayed the course and sewed the binding around the edges. 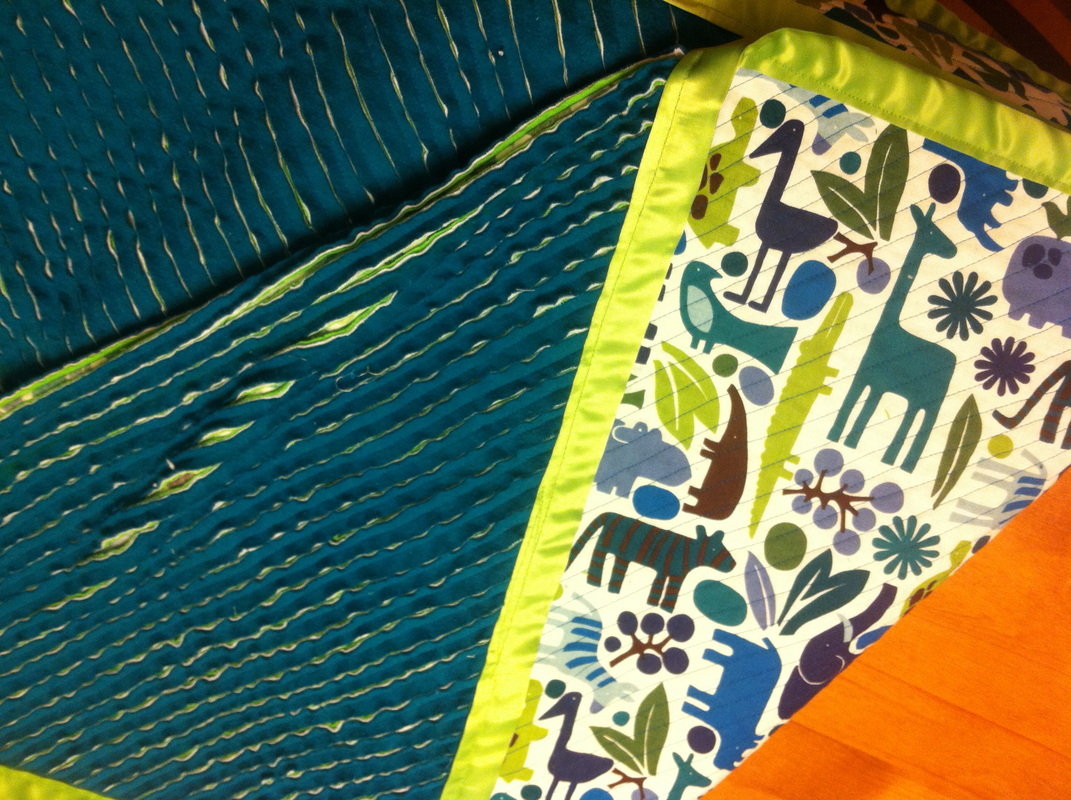 |


There it is! The finished blanket after being run through the washer and dyer twice. The more you wash this blanket the more the cotton flannel will become frayed and soft. There were worries in the house, that the frayed edges would ruin the washer and clog it up, or fray too much in the dryer and damage something. I must say, there was no such indication inside the washer afterwards or in the dryer. But, because of the "chance" I was banned from doing another project like this to where it had to be washed and dried so it wouldn't damage anything. So, this is the one and only hand-made chenille blanket I have made to this date. I plan on making more though, now that I will have my own place.
Minky Baby Blankets

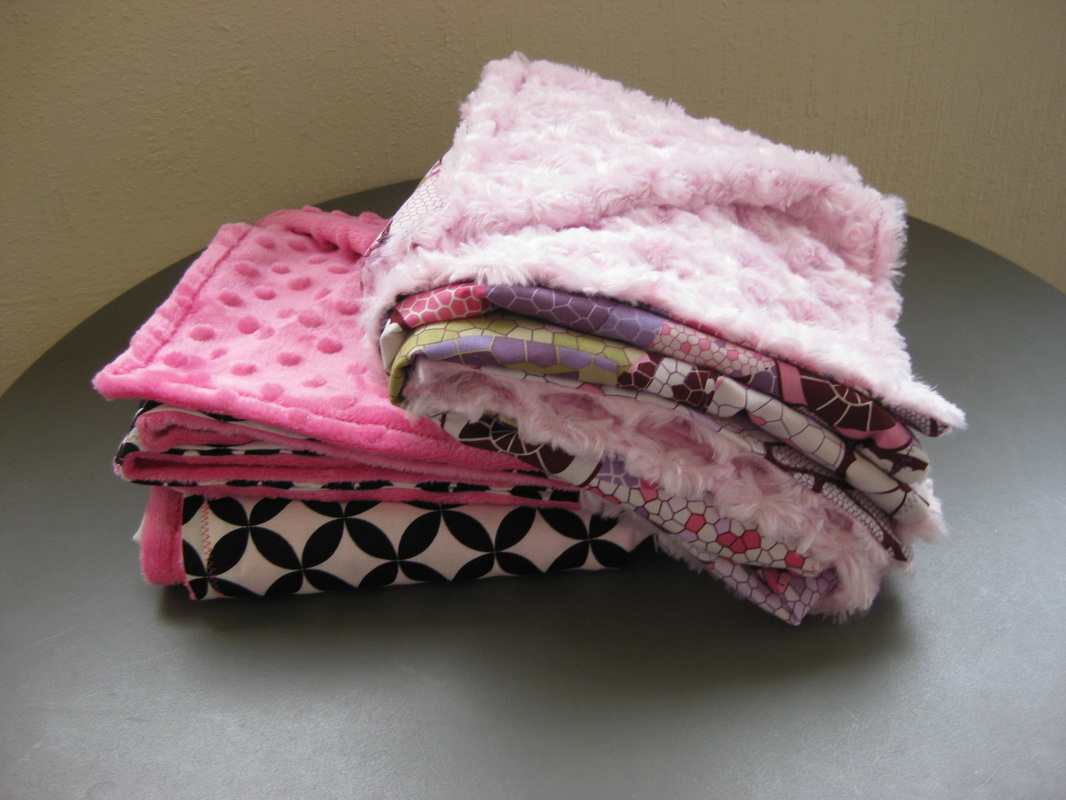
These I have made a ton of. Only because they are so easy and fast to make. That picture is one of my favorites that I've taken to show case some of my work. ^_^ I tend to define all the super soft and cuddle fabric as "minky" although, I think the standard type of minky is the soft dotted minky. I am not totally for sure on that. But, I've used tons of different types. I love the rosette minky some times. I have a huge stash of the dotted minky that I buy when the remnant section of the fabric stores put it on sale. It's always a great deal getting that fabric more than 50% off, because it can be pretty expensive.
How I make the minky blankets:
First I cute the fabric 31"x36inches. I tend to make the minky fabric side a little bit bigger. The minky tends to stretch and move around a lot when you are sewing. I make it a little bit bigger so when I sew, I can clearing see the edge so I have no holes in my seams. I sew the fabrics together right sides facing each other. Leaving a small gap, I reverse the fabrics and sew a seam to double seam the blankets. I love to use the zig-zag stitch pattern. Gives it that cute little flare. Then I'm done! Bam! So easy. The blankets end up being a really generous size of 30"x35".
 |  |
Patch-Work Baby Blanket

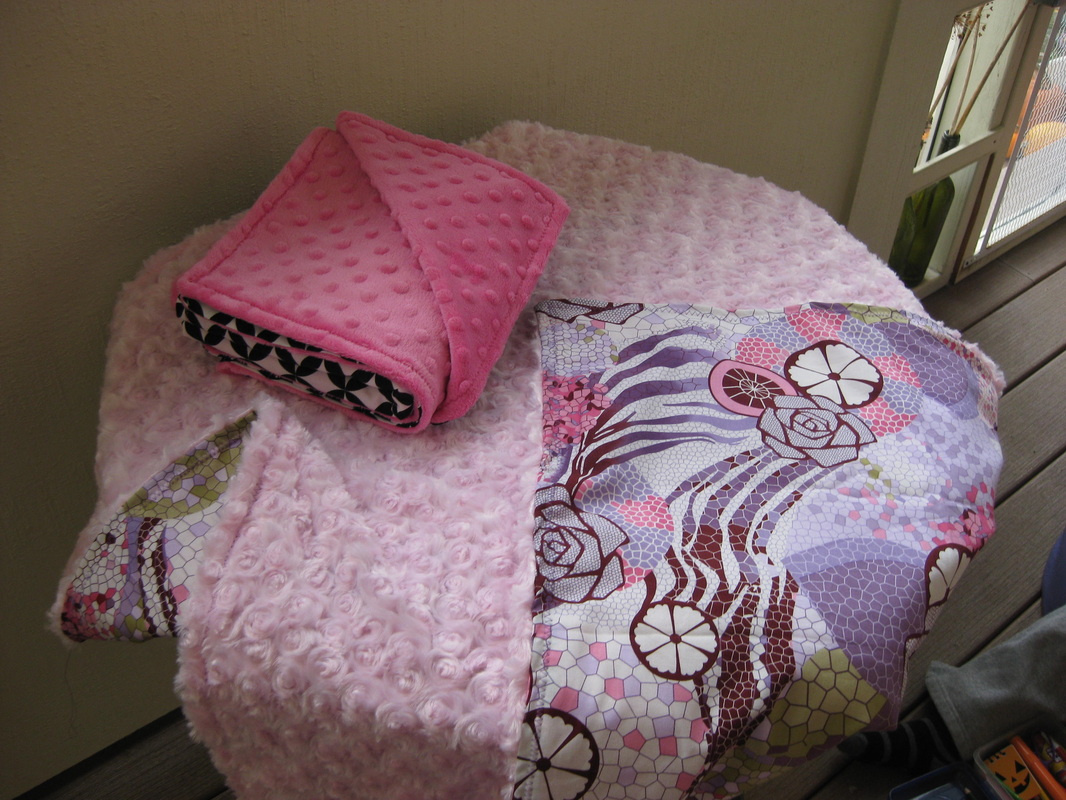
My Mom had asked me to come up with a patch-work design for a baby blanket. Everyone saw my patch-work scarves that I made everyone for Christmas. This is what I ended up coming up with. This is my first attempt at a sort of semi-quilted blanket besides the chenille blanket. A friend of my mom's was having a baby and she wanted something special to give her.
Again it was super difficult for me to come up with the perfect fabrics that fit well together. Projects for girls tend to be way easier than finding coordinating fabrics for a boys though. I ended up with 3 quilting fabrics, and two minky fabrics for the patch work. You can't see it in the picture, but I used my all time favorite soft and cuddly fabric for the backing.
Again it was super difficult for me to come up with the perfect fabrics that fit well together. Projects for girls tend to be way easier than finding coordinating fabrics for a boys though. I ended up with 3 quilting fabrics, and two minky fabrics for the patch work. You can't see it in the picture, but I used my all time favorite soft and cuddly fabric for the backing.
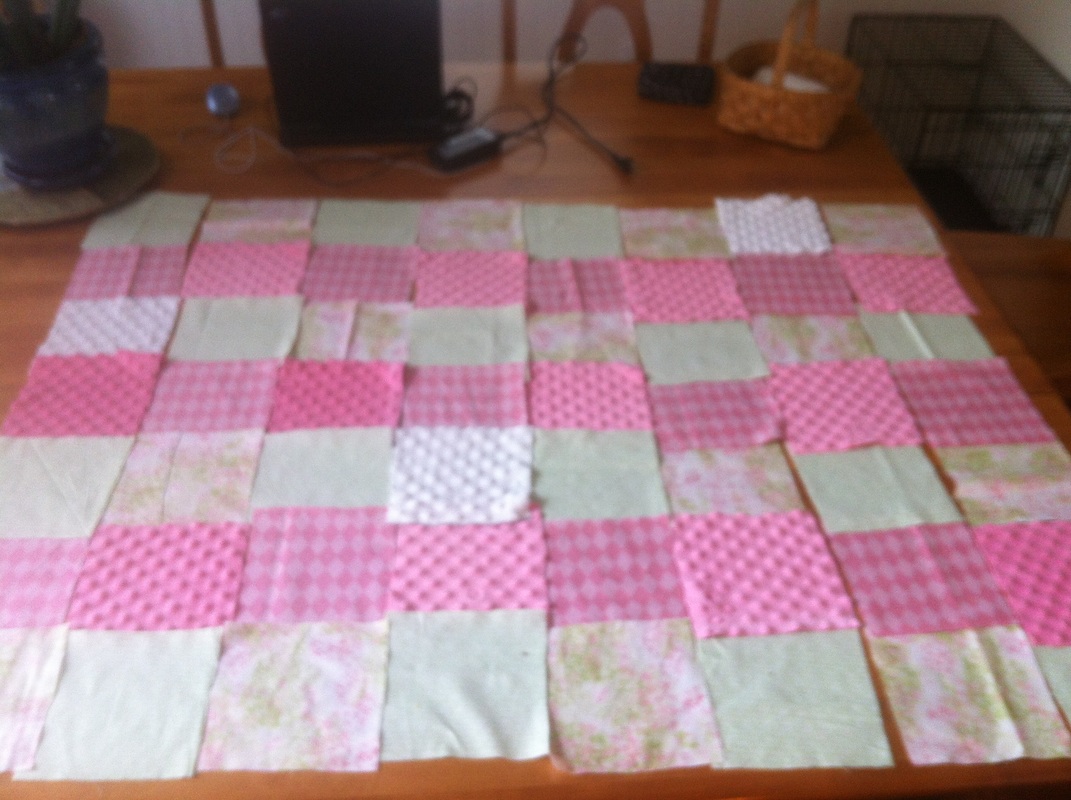 |  |
In order to keep everything organized, I planned out the order of the patches out on the table. I then stacked them up in their individual rows and labeled them by numbers. After I sewed the rows together I still kept them labeled so that I knew which row went where. This was important because there were only 4 white minky squares and they were sort of randomly laid out in the pattern. I wanted a little bit more splash of color. I am not that great at perfectly matching up all the sides of the squares making the seams fit making the beautiful quilted lines, but it wasn't a total disaster.
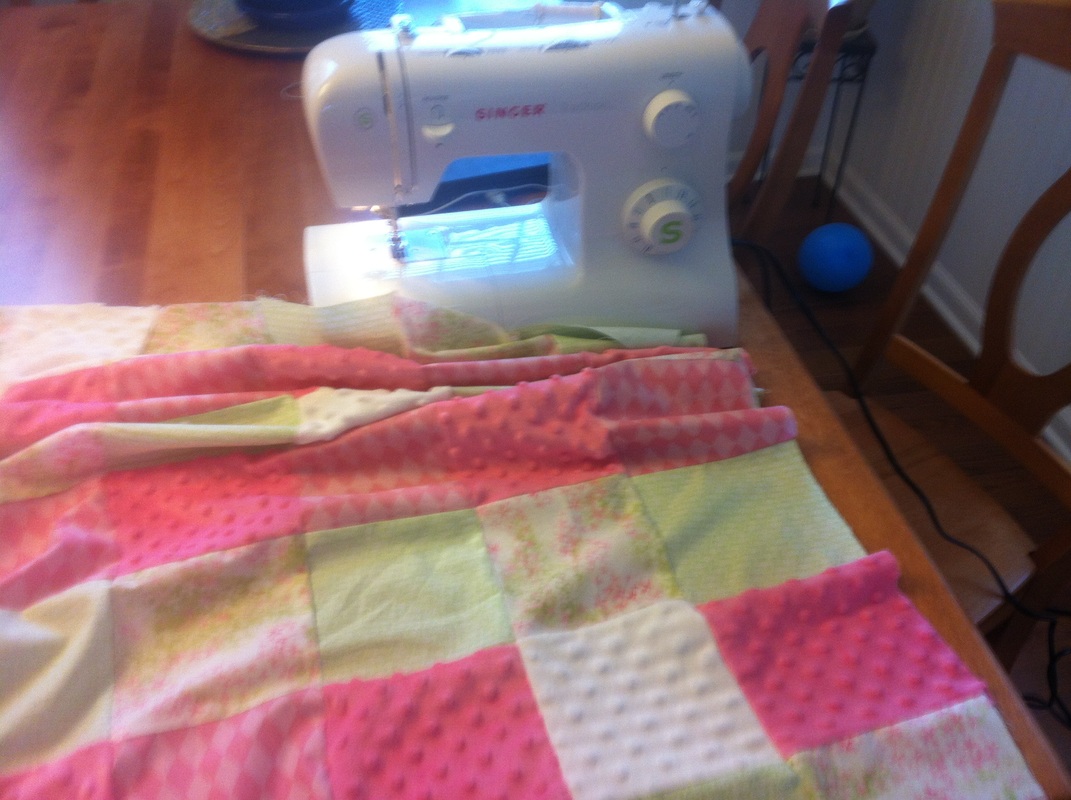
I forget what the last dimensions of the blanket ended up being, but it was a lot bigger than the minky baby blankets I make. I love how this blanket turned out. This blanket I didn't follow a design or template, I just followed the image I had in my mind. It turned out very nice. Whenever I finish a project and it turns out fantastic, I have a hard time letting it go for some reason. But, I knew who I made it for would appreciate it.
I forget what the last dimensions of the blanket ended up being, but it was a lot bigger than the minky baby blankets I make. I love how this blanket turned out. This blanket I didn't follow a design or template, I just followed the image I had in my mind. It turned out very nice. Whenever I finish a project and it turns out fantastic, I have a hard time letting it go for some reason. But, I knew who I made it for would appreciate it.

Those are the only blanket projects that I have ventured into as of right now. I have a whole list of blanket tutorials I want to try out once I get back into the swing of sewing and having my crafts all set up again. Making the blankets involves tons of planning and preparing, which gets to be a little much. So, I only tend to work on blankets sporadically. Anyone have any favorite quilting tutorials they'd like to share? Don't hesitate to let me know! I am always looking to add new projects to my forever growing To-Do list.
Happy Sewing!

 RSS Feed
