I just recently, last month, finally graduated college (YAY!!!!!) Well I had to do an externship in order to graduate. As a parting gift at the end of my extern and to say thank you to all the girls in the doctor's office that taught me and helped me, my sister and I made some of our hand-made truffles to bring in for them. They were a huge hit. ^_^
We had previously made them for my aunt's babyshower as her party favor. Every girl's best friend is chocolate right? It was a major hit back then too. And I wanted to share with everyone our recipe and how we make them. I don't have full step by step pictures but I do have a few from when we made over 200 truffles for the baby shower.
First off, we never really followed a real recipe per say. But, my sister (who is helping me write this blog post!) and I have put together a recipe. Before we start with the recipe, we are going to start off with giving some pointers on how to work with chocolate. It can be difficult to work with if you haven't ever worked with it before.
*Avoid getting water mixed in with the chocolat at all costs! When melted chocolate comes into contact with water, it will start to clump up and become unworkable. The chocolate then is ruined.
*DO NOT OVER HEAT! Chocolate is very sensitive to work with. You have to be very careful to not over heat the chocolate. When over heated, the chocolate will burn and become very thick and clumpy. I think they refere to this as "seizing". You can not fix chocolate once it has over heated or come into contact with water.
*Avoid using wooden spoons. There can be moisture locked into the wood and this could make the chocolate become lumpy.
*When using a double boiler, bring water to a boil then simply keep the water hot. The boiling water can be a risk to getting water into the chocolate and the steam can quickly cause the chocolate to burn.
*If you are using chocolate melting bars, make sure to chop it up into small enough bits.
* You want to use baking chocolate, not normal chocolate chips. We like to use premium chocolate chips which can be found at local grocery stores, but we have also used the Wilton chocolate chips from craft stores.
What You'll Need for the ganache (chocolate filling)
1 cup bittersweet or semi-sweet chocolate melting chips
1/3 cup heavy whipping cream
Add flavoring: preserves or extract
This will make about enough ganache for about... 24-36 truffles. I know that's a large gap, but it all depends on how big you want the truffles to be. It's all guesstimation. It could make a ton more than that number or less. ^_^
How to make:
- You'll need to melt the chocolate chips. The method my sister and I like to use is the double boiler way. Which is using a sauce pan and a bowl that fits well on top the sauce pan. You boil water in the bottom sauce pan, and set the bowl with the chocolate chips on top. This allows the heat from the hot water to rise and melt the chocolate quick and easy. We like to stay away from microwave use as much as possible. Again, be careful to not over heat the chocolate. My sister and I ruined two whole bags of chocolate chips because we over heated it. It was terrible.
- Add 1/3 cup heavy whipping cream to melted chocolate. Now you'll want to whip in the heavy whipping cream into the melted chocolate which should be smooth.
- Add flavor. At this point, if you wish to add any type of flavor you would add it in now. My all time favorite to add is, raspberry preserves. We like using preserves whenever possible because it adds more texture and more pop of real flavor to the ganache. You may also use any type of extract like peppermint or mint, we used orange extract for some of the truffles.
- Place ganache into freezer until solid ( 1/2 hour to 1 hour). Once you whip in the heavy whipping cream and flavoring if you want one, you will now place the ganache into the freezer to harden up. This makes it easier to roll into balls to dip into chocolate.
- Roll into ball and dip into chocolate. We like to work as a team on this part. The ganache will quickly melt in your hands and you have to work quick. One of us will roll the ganache and throw into a bowl of melted chocolate, while the other one will roll the ganache balls in the chocolate and place on wax paper to dry.

We like to clean up the truffles once they are all dry, because the chocolate will spread at the bottoms once it's placed onto the wax paper. After we get all the flavors done. These are all pictures from my aunt's baby shower. We did five different flavors. Milk Chocolate, mint, and vanilla are all coated in milk chocolate. The raspberry and orange flavored truffles were coated with dark chocolate.
To garnish the truffles we chose to go over them with colored white chocolate. Each flavor we dyed the white chocolate to match a color. You can also use cookie crumbles, chopped nuts, or other toppings. For the cookie crumbles and nuts, after you roll the ganache in the melted chocolate, transfer that to another bowl with your desired topping and roll it. Or you could simply sprinkle the toppings onto the top of the truffles once they are on the wax paper before the dry. I find the second one to be less messy.
We placed white chocolate chips into icing piping bags and placed it in the microwave to melt. We normally don't use the microwave but this was the easiest and less messy way for 5 different colors. We added special food dye that is oil based. DO NOT USE NORMAL FOOD COLORING! Normal food coloring is water based and you will cause the chocolate to clump and the color will not look right. Wilton makes good oil based dyes, which you can find and almost any Joann Fabrics. You add this oil based dye into the piping bags and mix it well until the color is even.

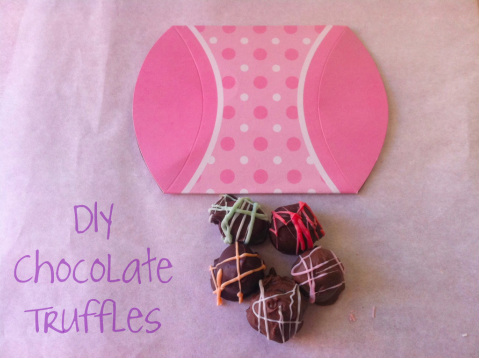
Instead of using an icing tip, we just cut a tiny hole in the bottom of the piping bag and added the drizzle crazy against the truffles. It gave us a cute, quick, and easy way to identify all the different flavors. Once all the chocolate is dry you can lift them off the paper and break off the white chocolate cleaning them up. As you can see in the above picture at the way top, they all turned out really cute. ^_^

This is a super cute gift idea for those of you out there for Valentine's Day that is coming around the corner. My sister and I, we follow a Japanese custom of Valentine's Day were you make hand-made chocolates and give that to friends and your crush, instead of giving valentine cards and such. ^_^ We have been doing this for years since we took Japanese in high school. I studied Japanese in college also, and this little part of their culture has followed me around. I adore it, and it's different.
For my aunt's baby shower, we bough those cute little gift boxes to place them in. We wrapped the five truffles in tissue paper and placed them inside the box. We then added "It's A Girl" ribbon and our own hand-made tags that had a thank you stamp on one side and on the other we put which color truffle was which flavor. We placed them on the tables next to the fresh spring flowers. It was a lot of work, but it was worth the response we got and how much my aunt loved. it. ^_^
For my aunt's baby shower, we bough those cute little gift boxes to place them in. We wrapped the five truffles in tissue paper and placed them inside the box. We then added "It's A Girl" ribbon and our own hand-made tags that had a thank you stamp on one side and on the other we put which color truffle was which flavor. We placed them on the tables next to the fresh spring flowers. It was a lot of work, but it was worth the response we got and how much my aunt loved. it. ^_^

Happy Baking!!


 RSS Feed
